Why You’ll Love This Rainbow Cake Recipe
When you take a bite of this Rainbow Cake, you’ll instantly understand why it’s a favorite for celebrations. The vibrant layers burst with color, making every slice a feast for the eyes and the taste buds.
I love how the flavors dance together, from fruity essences to the buttery richness of the cake itself. Whether it’s a birthday, an anniversary, or just a sunny day, this cake brings joy and smiles.
Plus, the process of creating those beautiful layers is incredibly rewarding. Trust me, once you try it, you’ll be hooked on this delightful treat that everyone adores!
Ingredients of Rainbow Cake
When it comes to baking a stunning Rainbow Cake, the ingredients are just as colorful as the final product. You’ll need a mix of pantry staples and a few special touches that bring the flavors to life. Trust me, once you gather these goodies, you’ll be on your way to creating a show-stopping dessert that’ll impress everyone at your next gathering.
Plus, the combination of flavors is simply irresistible. Who can say no to a cake that’s as delightful to look at as it’s to eat?
Here’s what you’ll need to whip up this vibrant masterpiece:
- 1 cup butter
- 1 3/4 cups sugar
- 3 cups flour
- 5 eggs
- 1 1/2 teaspoons baking powder
- 1/2 teaspoon bicarbonate of soda
- 1 cup milk
- 1 teaspoon green food coloring
- 1 teaspoon red food coloring
- 1 teaspoon yellow food coloring
- 1 teaspoon rose essence
- 1 teaspoon pineapple essence
- 1 teaspoon strawberry essence
Now, let’s talk about a few considerations when it comes to these ingredients. For starters, using good-quality butter can really elevate the flavor of your cake. I mean, who wants a rainbow with a dull taste?
And don’t skimp on the food coloring—this is the time to get bold! If you’re feeling adventurous, you could even experiment with different essences or colors to create your own signature blend.
Just remember, the magic is in the details, and each layer should reflect your personality (or at least your love for cake). So gather your ingredients, roll up those sleeves, and get ready for a colorful baking adventure!
How to Make Rainbow Cake
Making a Rainbow Cake isn’t just about baking; it’s about creating a colorful experience that fills your kitchen with joy. To kick things off, you’ll want to start by gathering all your ingredients. You need 1 cup of butter, 1 3/4 cups of sugar, 3 cups of flour, 5 eggs, 1 1/2 teaspoons of baking powder, and 1/2 teaspoon of bicarbonate of soda—don’t mix those two up, or you might end up with a cake that could double as a science experiment.
You’ll also need a cup of milk and some vibrant food coloring—green, red, and yellow, each at 1 teaspoon, along with rose, pineapple, and strawberry essences (1 teaspoon each). Phew, that’s quite the lineup, but trust me, it’s worth it.
Once you have everything ready, the fun begins. Start by sieving the 3 cups of flour with the baking powder and bicarbonate of soda. This little trick helps to aerate your flour, making your cake light and fluffy—like a cloud, but tastier.
Next, in a large mixing bowl, cream together the 1 cup of butter and 1 3/4 cups of sugar until it’s light and fluffy. You want it to be so airy that it could float away—okay, maybe not quite that airy, but you get the idea.
Now, here’s the important part: add the 5 eggs one at a time. I know, it’s tedious, but it really helps the cake rise beautifully. After all the eggs are in, mix everything well, then gently fold in your flour mixture alternately with the 1 cup of milk until you have a smooth batter.
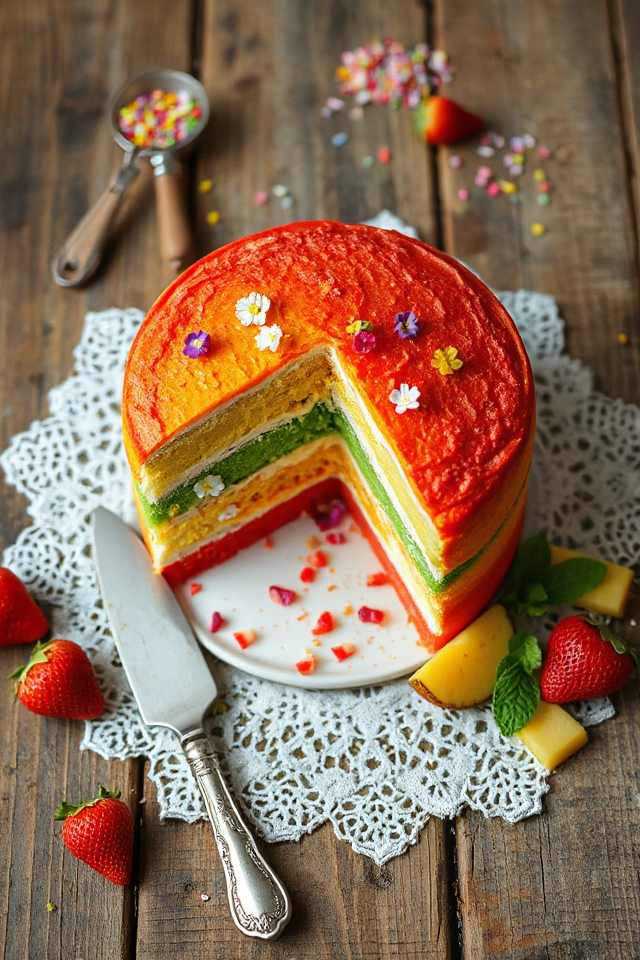
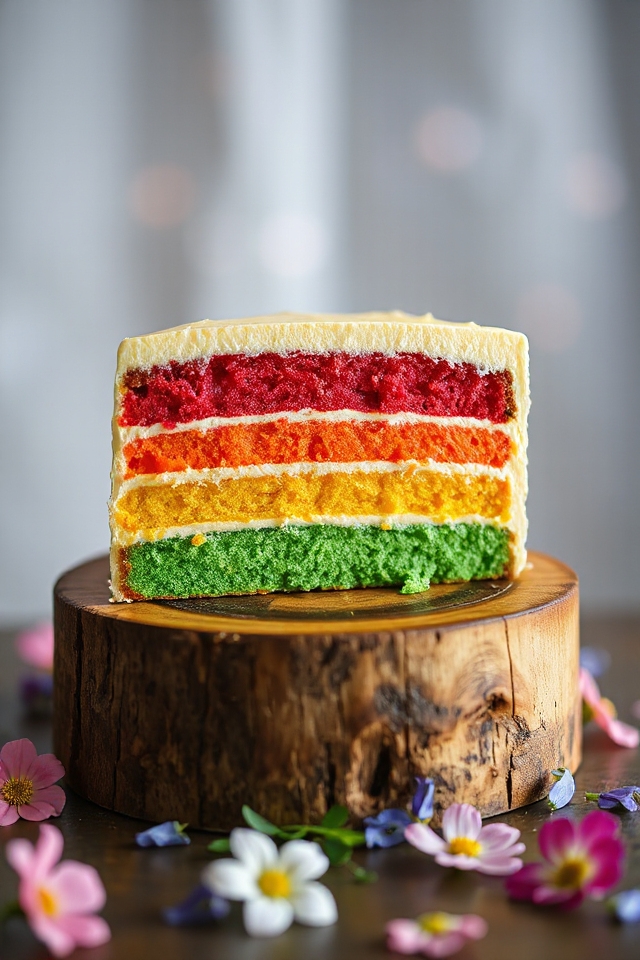
Now comes the colorful part! Divide your batter into three equal parts—this is where the magic happens. In one bowl, add the green food coloring and the rose essence; in another, the yellow food coloring and pineapple essence; and in the last one, the red food coloring and strawberry essence.
Imagine the colors swirling together like a painter’s palette. Once you’ve mixed those in, you’re ready to layer. Pour the green batter into the bottom of your round cake tin, then gently add the red batter in the middle, and finish with the yellow on top. It’s like building a cake rainbow—how cool is that?
Now, pop your masterpiece into the oven and bake it for about 45 minutes. You’ll know it’s done when a toothpick inserted into the center comes out clean. Let it cool before serving, and prepare for the oohs and aahs as you slice into your vibrant creation.
Enjoy the sweet satisfaction of a job well done—because you just created a slice of happiness!
Rainbow Cake Substitutions & Variations
If you’re looking to switch things up with your rainbow cake, there are plenty of substitutions and variations to explore that can still deliver that vibrant wow factor.
For a lighter cake, try using egg whites instead of whole eggs. You can also swap butter for coconut oil for a unique flavor twist. If you’re dairy-free, almond or soy milk works beautifully.
For the colors, get creative with natural dyes like beet juice or spirulina. Want a flavor boost? Experiment with different extracts like almond or vanilla.
Each variation can make your rainbow cake uniquely yours while keeping it stunning!
What to Serve with Rainbow Cake
What complements a stunning rainbow cake better than a delightful array of accompaniments?
I love serving it with fresh whipped cream; it adds a light, airy texture. You can’t go wrong with a scoop of vanilla ice cream either; the contrast of temperatures is heavenly.
A sprinkle of edible glitter or colorful sprinkles can enhance the visual appeal too. For a fruity twist, consider a berry compote; it balances the sweetness perfectly.
If you’re feeling adventurous, a drizzle of chocolate sauce can add richness. These options elevate the experience, making your rainbow cake moment even more special.
Enjoy!
Additional Tips & Notes
While preparing your rainbow cake, keep in mind a few tips that can elevate your baking experience.
Make sure your butter is at room temperature; it helps create a fluffy texture. I also recommend using gel food coloring for vibrant hues—liquid colors can dilute your batter.
When dividing the batter, weigh each portion for consistency. Don’t skip lining your cake tin with parchment paper; it’ll make removal easier.
Finally, let your cake cool completely before frosting to prevent melting. Enjoy the process, and don’t be afraid to get creative with flavors or decorations!
Happy baking!