Why You’ll Love This Hot Chocolate Cake Recipe
If you’re looking for a dessert that’s both comforting and indulgent, you’re going to love this Hot Chocolate Cake recipe.
The rich, chocolatey flavor hits all the right notes, making it perfect for cozy evenings or special celebrations.
I adore how the cake has a moist texture that just melts in your mouth, and the aroma that fills my kitchen while it bakes is simply heavenly.
Plus, it’s easy to whip up, even on a busy day.
Trust me, once you take that first bite, you’ll understand why this cake has become a favorite in my household!
Ingredients of Hot Chocolate Cake
When it comes to baking, having the right ingredients is key, especially for a delightful treat like Hot Chocolate Cake. This cake isn’t only rich and chocolatey but also incredibly simple to make. You probably already have most of these ingredients in your pantry, which is a huge plus.
I mean, who doesn’t love a recipe that doesn’t require a scavenger hunt through the grocery store, right? So, let’s gather what you need to get started on this deliciously comforting cake.
Here’s what you’ll need for the Hot Chocolate Cake:
- 3 large eggs
- 1 1/2 cups sugar
- 1 teaspoon vanilla extract
- 3/4 cup hot cocoa, prepared
- 1 tablespoon butter
- 1 1/2 cups all-purpose flour
- 1 1/2 teaspoons baking powder
- 1/2 teaspoon salt
Before you plunge into making this cake, there are a few things to take into account about the ingredients. First, make sure your eggs are at room temperature; this helps them blend better with the sugar and leads to that lovely thick batter we’re aiming for.
And when you’re measuring your flour, it’s always a good idea to spoon it into your measuring cup and level it off with a knife, rather than scooping directly from the bag. This little tip can prevent your cake from being too dense.
Finally, if you’re feeling adventurous, you could swap out the vanilla extract for almond extract for a nutty twist, or even throw in some chocolate chips for extra decadence.
Just remember, the key to a great cake isn’t just in the ingredients, but in the love you put into it. Happy baking!
How to Make Hot Chocolate Cake
Making a Hot Chocolate Cake is like wrapping yourself in a warm, chocolatey blanket—perfect for when you need a little comfort food in your life. So, let’s get started on this delightful journey.
First, preheat your oven to 325°F. This step is essential because no one wants to put a cake in a cold oven and end up with a sad, undercooked dessert.
While that’s heating up, grab a large bowl and crack in 3 large eggs. Add 1 ½ cups of sugar and beat them together until the mixture is thick and creamy. You want it thick enough that when it falls from the beaters, it leaves a nice ribbon behind. It’s kind of like magic, isn’t it?
Now, stir in 1 teaspoon of vanilla extract because, let’s be honest, vanilla makes everything better.
While you’re working that egg and sugar mixture, take a small saucepan and heat up ¾ cup of prepared hot cocoa with 1 tablespoon of butter over medium heat. You want it to just start simmering—don’t let it boil, or you’ll have a chocolate volcano on your hands, and nobody wants that mess.
Once it’s ready, slowly pour that luscious hot chocolate mixture into your egg mixture, keeping the beaters going.
Now, in a separate bowl, whisk together 1 ½ cups of all-purpose flour, 1 ½ teaspoons of baking powder, and ½ teaspoon of salt. This is your dry mix that will bring everything together. Gently fold this into your wet ingredients, mixing just until combined. Over-mixing is a cake’s worst nightmare; it can turn your fluffy dessert into a dense brick.
Now comes the fun part—pouring the batter into a lightly greased 9-inch round cake pan. As you do this, you can almost hear the cake saying, “I’m going to be delicious.”
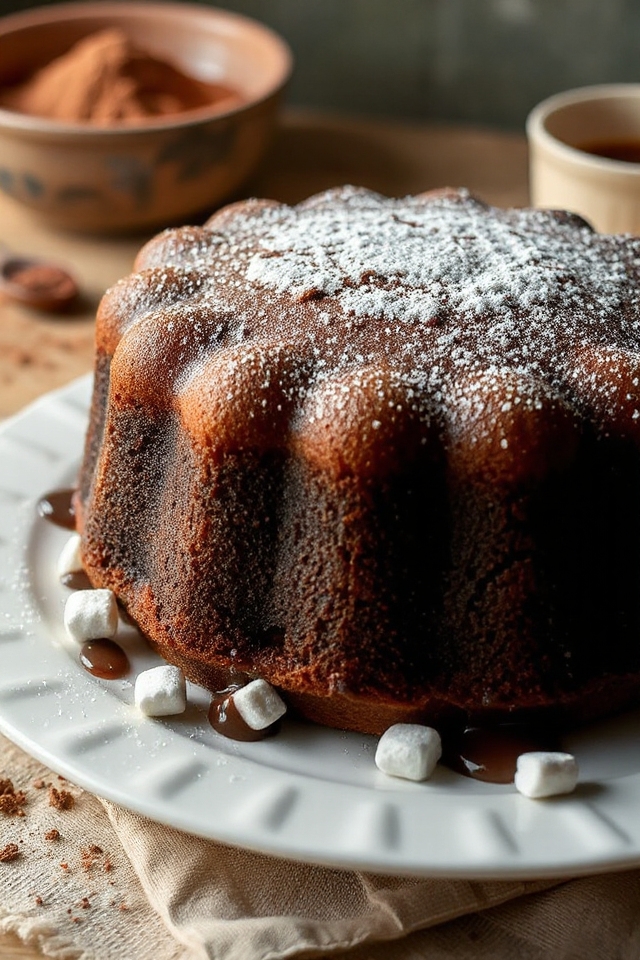
Pop it into the oven and let it bake for about 50 minutes. You’ll know it’s done when it’s a glorious deep golden brown and starts pulling away from the sides of the pan.
Once out of the oven, let it cool in the pan for about 10-15 minutes. This is when the aroma fills your kitchen, making you wonder why you don’t bake more often.
After cooling, run a knife around the edges to loosen it. Then, turn it out onto a cooling rack.
You’ve just created a beautiful Hot Chocolate Cake, and I promise, the taste will be worth every bit of effort you put in. Enjoy!
Hot Chocolate Cake Substitutions & Variations
After whipping up that delicious Hot Chocolate Cake, you might find yourself wondering how to customize it to suit your taste or dietary needs.
You can easily swap the all-purpose flour for gluten-free flour or almond flour if you’re avoiding gluten. For a richer flavor, try using dark cocoa instead of regular hot cocoa.
If you prefer a dairy-free option, substitute the butter with coconut oil or vegan butter. You can even add a pinch of espresso powder for a mocha twist.
Feel free to incorporate chocolate chips or nuts for an extra texture boost—get creative and make it your own!
What to Serve with Hot Chocolate Cake
Hot Chocolate Cake pairs beautifully with a variety of accompaniments that elevate its rich flavors.
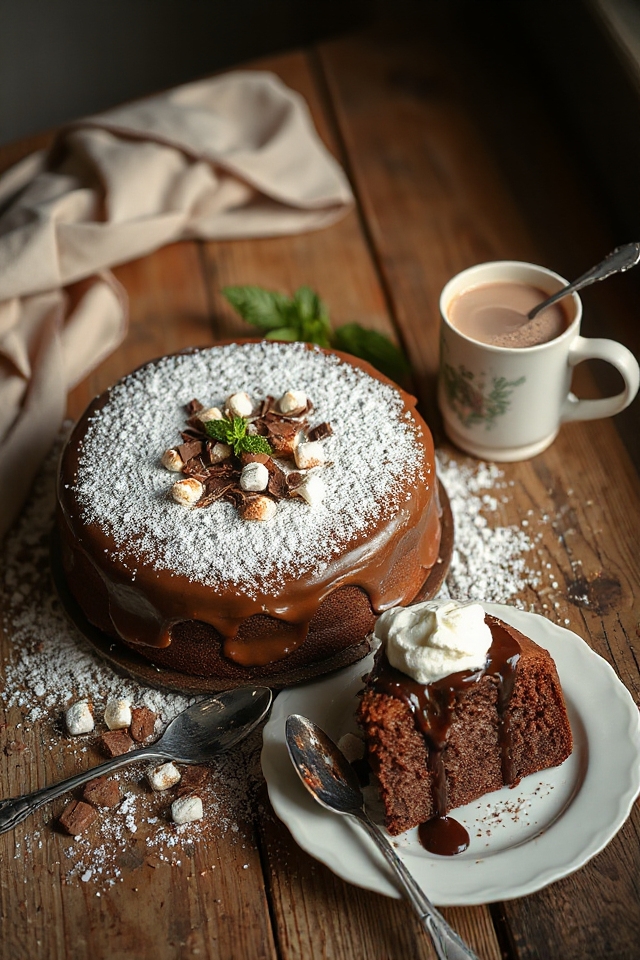
I love serving it warm alongside a scoop of vanilla ice cream; the cold creaminess perfectly balances the cake’s warmth. A drizzle of caramel sauce adds a delightful sweetness, while fresh berries bring a bright, tangy contrast.
You can also sprinkle some whipped cream on top for an extra indulgent touch. If you’re feeling adventurous, try adding a splash of espresso to the cake, enhancing its chocolatey notes.
Whatever you choose, these pairings make every bite of Hot Chocolate Cake even more memorable!
Additional Tips & Notes
While baking the Hot Chocolate Cake, I’ve found a few tips that can make a big difference in the final result.
First, make sure your eggs are at room temperature; they mix better and help create a lighter batter. I also recommend using a high-quality cocoa powder for richer flavor.
When pouring in the hot chocolate mixture, do it slowly to avoid cooking the eggs. Be careful not to overmix the batter; a few lumps are okay.
Finally, let the cake cool completely before frosting to prevent melting. Trust me, these little tweaks can elevate your cake to the next level!