
Why You’ll Love This Chocolate Eclair Cake Recipe
If you’ve ever craved the delightful taste of chocolate eclairs but didn’t want the fuss of baking, then this Chocolate Eclair Cake recipe is for you.
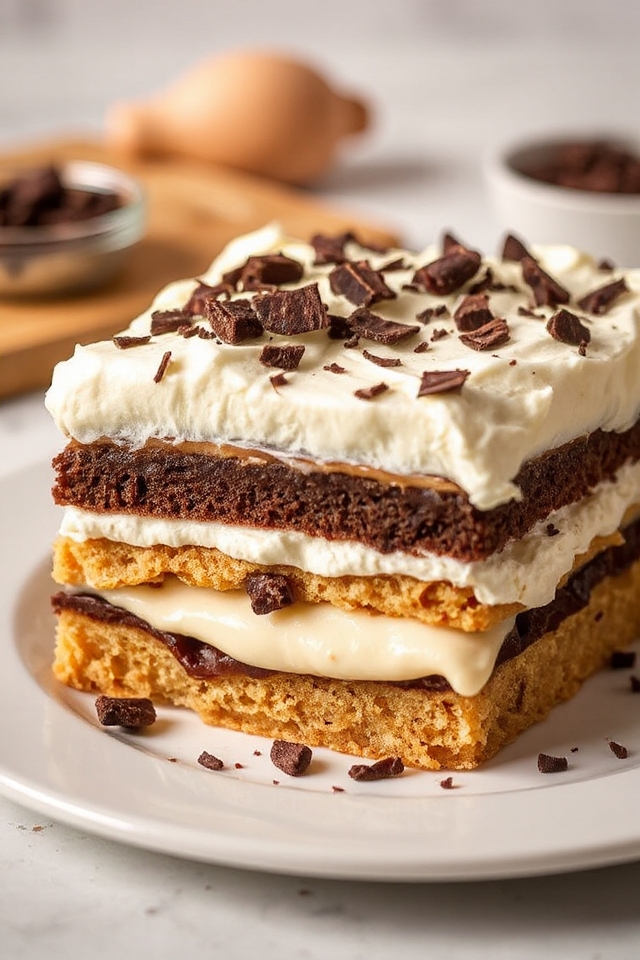
I love how simple it’s to create a dessert that impresses everyone. The creamy layers of pudding and cream cheese blend perfectly with the light, airy crust.
It’s a no-bake dream that’s perfect for gatherings or a family treat. Plus, it’s customizable—feel free to switch up the pudding flavor!
You’ll love how quick it comes together, and the chocolate shavings on top make it look just as good as it tastes.
Ingredients of Chocolate Eclair Cake
When it comes to whipping up a delightful dessert, this Chocolate Eclair Cake recipe has to be one of the easiest yet most impressive options out there. Seriously, who doesn’t love a good eclair?
But let’s be real, making the actual pastry can be a bit of a hassle. That’s where this recipe shines—it’s all about those creamy layers without the fuss of traditional baking. You get that rich chocolate flavor and fluffy texture, all while keeping it simple.
So, if you’re ready to plunge into making this delicious treat, let’s gather those ingredients.
Ingredients for Chocolate Eclair Cake:
- 1 cup cold water
- 1/2 cup butter
- 1 cup flour
- 4 eggs
- 1 (6 ounce) package chocolate pudding (or any flavor you prefer)
- 2 1/2 cups milk
- 8 ounces cream cheese, softened
- Whipped cream or Cool Whip (for topping)
- Chocolate shavings (for garnish)
Now, before you start gathering your ingredients, let’s chat for a minute. You can definitely get creative with this recipe.
For instance, if you’re not a die-hard chocolate fan, swap out the pudding for vanilla or even caramel. The world is your oyster—or should I say, your eclair?
Also, if you’re trying to save a few calories, the whipped cream alternative is a great way to lighten things up without sacrificing taste. Just remember, each ingredient plays a role in making this cake heavenly, so don’t skimp on quality.
Trust me, your taste buds will thank you later. Ready to plunge into the next steps? Let’s make this cake!
How to Make Chocolate Eclair Cake
Making your Chocolate Eclair Cake is like starting a culinary adventure—exciting, a tad messy, but totally worth it. First, grab your 1 cup of cold water and 1/2 cup of butter, and toss them into a pot over medium heat. Now, this part is essential: stir them together until the mixture comes to a boil. Once you see those bubbles, remove it from the heat. It should form a beautiful ball when stirred. If it doesn’t, don’t panic! Just give it another stir, and trust me, it’ll come together.
Now, here’s where things get a little workout-y—add in your 1 cup of flour and stir vigorously. It might feel a bit like you’re mixing dough for a workout session, but hang in there. Then, one at a time, crack in 4 eggs, mixing well after each addition. You’re going for a smooth consistency here, so don’t rush this step.
Now that you’ve got your dough ready, it’s time to spread this golden goodness into a greased 8 x 12 pan. Try to spread it out evenly; it’s like laying the foundation for a delicious cake. Pop it in an oven preheated to 400°F and let it bake for about 20 to 25 minutes. You want it to turn a lovely golden brown—think of the perfect tan, but for cake.
Once it’s out, let it cool completely. This is essential; you don’t want to melt your creamy layers when you spread them on top.
While your crust is cooling, you can whip up the creamy filling. In a bowl, combine the 2 1/2 cups of milk with a 6-ounce package of chocolate pudding. You can use any flavor, so feel free to get adventurous if you’re feeling bold. Add in 8 ounces of softened cream cheese and mix it all together with an electric mixer until it’s smooth and dreamy.
Now, spread this luscious mixture over your cooled crust. As a finishing touch, cover it all with whipped cream or Cool Whip—whatever floats your boat—and sprinkle some chocolate shavings on top. Slice it into squares, and there you have it—your very own Chocolate Eclair Cake. Just don’t blame me if you can’t resist going back for seconds, or thirds.
Chocolate Eclair Cake Substitutions & Variations
While creating your Chocolate Eclair Cake, you might want to switch things up a bit with some fun substitutions and variations. For a lighter option, use Cool Whip instead of whipped cream.
You can also experiment with different pudding flavors—vanilla, butterscotch, or even cheesecake can add a unique twist!
If you’re feeling adventurous, try adding a layer of fresh fruit, like strawberries or raspberries, between the pudding and whipped cream. For a nutty flavor, sprinkle chopped nuts on top.
Don’t hesitate to adjust the chocolate shavings, too; dark chocolate or even white chocolate can enhance the flavor beautifully!
What to Serve with Chocolate Eclair Cake
To elevate your Chocolate Eclair Cake experience, consider pairing it with a scoop of vanilla ice cream or a dollop of fresh fruit compote. This combination adds a delightful contrast to the rich, creamy layers of the cake.
I also love serving it alongside a cup of freshly brewed coffee or a warm cup of tea, which cuts through the sweetness beautifully. For a more decadent treat, drizzle some chocolate or caramel sauce over the top.
You can’t go wrong with a sprinkle of toasted nuts for added crunch, either. Enjoy exploring these delightful pairings with your cake!
Additional Tips & Notes
If you’re looking to elevate your Chocolate Eclair Cake, consider using high-quality ingredients for the best flavor.
I also recommend letting the cake chill overnight; it really helps the flavors meld together.
Feel free to experiment with different pudding flavors—vanilla or butterscotch can add a delightful twist.
If you want a lighter option, using Cool Whip instead of whipped cream can save some calories without sacrificing taste.
Finally, don’t skimp on the chocolate shavings; they add a nice touch and extra richness.
Trust me, these little tweaks can take your dessert to the next level! Enjoy your baking!