Why You’ll Love This Strawberry Cheesecake Recipe
When you take a bite of this strawberry cheesecake, you’ll immediately taste the perfect blend of creamy texture and fruity flavor.
I love how this dessert manages to be both rich and invigorating at the same time. The cream cheese creates a luscious base, while the strawberry notes dance on your palate, making it feel like spring in every slice.
It’s the kind of treat that brings joy to any gathering or simply brightens up your day. Plus, it’s surprisingly easy to make, so you can whip it up without any stress.
Trust me, you won’t be able to resist another slice!
Ingredients of Strawberry Cheesecake
When it comes to making a delicious strawberry cheesecake, having the right ingredients is key. This dessert combines the lovely sweetness of strawberries with the rich creaminess of cheesecake, creating a treat that’s hard to resist.
Before diving into the fun part of making it, let’s gather everything you’ll need. Trust me, having all your ingredients ready makes the baking process so much smoother and more enjoyable. Plus, who doesn’t love a colorful spread of ingredients laid out on the counter? It just makes you feel like a true culinary master, even if you accidentally spill a little flour in the process.
Here’s what you’ll need for your fabulous strawberry cheesecake:
- 1 (18 ounce) package strawberry cake mix
- 4 eggs
- 1 tablespoon oil
- 2 (8 ounce) packages cream cheese, softened
- 1/2 cup sugar
- 1 1/2 cups milk
- 1 tablespoon lemon juice
- 6 drops red food coloring
- 1 (2 5/8 ounce) envelope Dream Whip, prepared
Now, a little note on the ingredients: Don’t skimp on the cream cheese; it’s the heart and soul of this cheesecake. You want it to be nice and soft to mix easily and create that creamy texture we all crave.
Also, if you’re feeling adventurous, you could try swapping the strawberry cake mix for another flavor or even making your own cake mix from scratch. Just keep an eye on the baking time, as it might change a bit.
And if you want to go the extra mile, consider using fresh strawberries for topping instead of store-bought ones—they’re like the cherry on top, and they bring that fresh flavor to life!
Now, are you excited to start baking? I know I am.
How to Make Strawberry Cheesecake
Making a strawberry cheesecake might seem a bit overwhelming, but trust me, it’s easier than you think! Start by preheating your oven to a cozy 300°F. This is an important step because you want to guarantee that your cheesecake bakes evenly and comes out just right.
While that’s warming up, grab that 1 (18 ounce) package of strawberry cake mix. You’ll want to reserve 1 cup of it for later. In a large mixing bowl, combine the remaining cake mix with 1 egg and 1 tablespoon of oil. Mix it all together until it’s crumbly. Think of it as making a sandy beach; you want those crumbs to stick together just enough so you can press them firmly into the bottom and up the sides of a greased 13×9 pan.
Once your crust is in place, it’s time to whip up the creamy filling. In the same bowl (yes, the one you just used; we’re all about minimizing cleanup here), blend together 2 (8 ounce) packages of softened cream cheese and 1/2 cup of sugar. You’ll want to beat this mixture until it’s smooth and creamy—just picture a velvety cloud.
Add in 3 more eggs and the reserved cake mix, then beat it for about a minute at medium speed. Now, switch gears and lower the speed while you pour in 1 1/2 cups of milk, 1 tablespoon of lemon juice, and 6 drops of red food coloring. It should look like a delightful pink concoction that makes you think of spring.
Pour this luscious mixture over your crust and pop it into the oven. Bake it for 45 to 55 minutes, or until the center is firm.
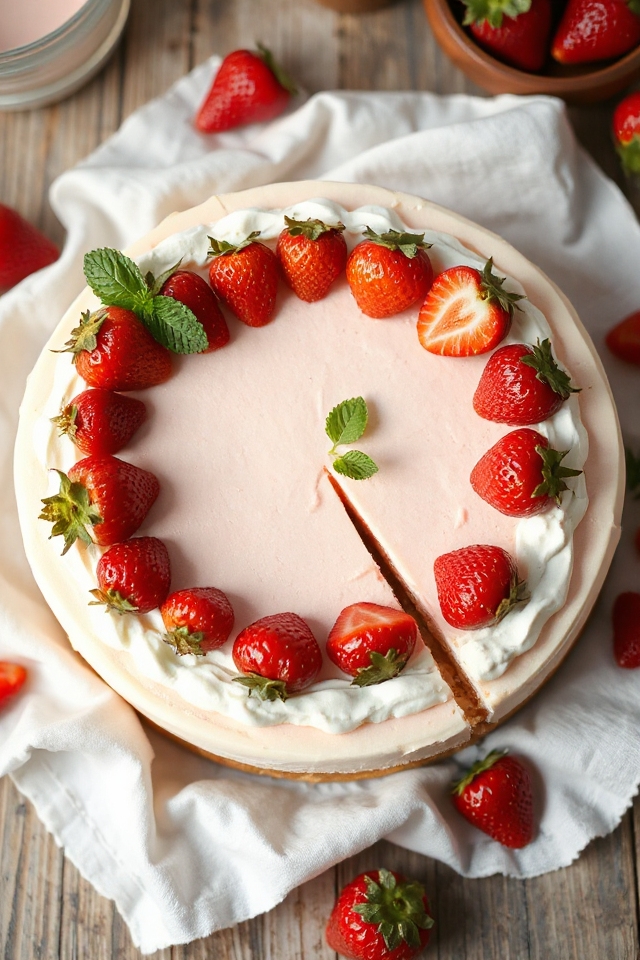
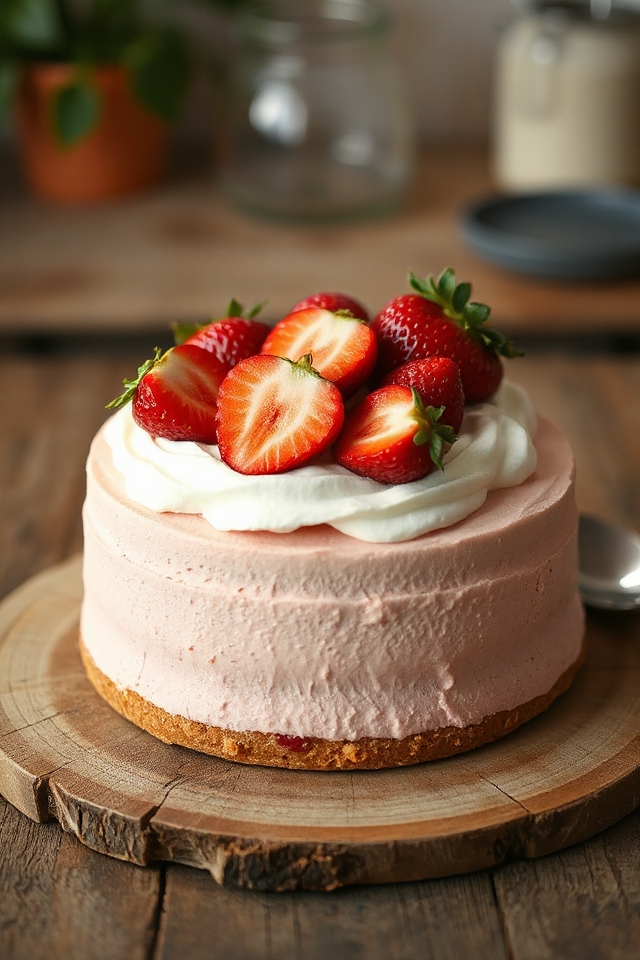
While it’s baking, you can take a breather and dream about how delicious your cheesecake will be. Once it’s done, let it cool down a bit before spreading on the prepared 1 (2 5/8 ounce) envelope of Dream Whip. Oh, and don’t forget to garnish with fresh strawberries; they’re like the cherry on top of this dreamy dessert.
Chill your cheesecake in the fridge for a while before serving, and voila! You’ve just created a strawberry cheesecake that will impress anyone fortunate enough to have a slice. Just remember, if it doesn’t turn out perfect, you can always blame the oven, right? Happy baking!
Strawberry Cheesecake Substitutions & Variations
If you’re looking to mix things up with your strawberry cheesecake, there are plenty of substitutions and variations to contemplate.
For a gluten-free option, I often swap the cake mix for a gluten-free blend or almond flour. You can also replace cream cheese with mascarpone for a richer flavor.
If you’re feeling adventurous, try adding a swirl of chocolate or caramel sauce to the filling. For a fruity twist, incorporate different berries like blueberries or raspberries.
Finally, experimenting with flavored extracts, like vanilla or almond, adds a new depth to the classic taste. Enjoy customizing your creation!
What to Serve with Strawberry Cheesecake
After you’ve customized your strawberry cheesecake with delicious variations, it’s time to think about what to serve alongside it.
I love pairing it with a dollop of whipped cream or a scoop of vanilla ice cream for that creamy contrast. Fresh strawberries or a berry compote on the side add a revitalizing touch.
For something more decadent, a drizzle of chocolate sauce can elevate the dessert experience.
If you’re looking for a drink, a chilled glass of sparkling rosé or a cup of coffee balances the sweetness perfectly.
Choose what you enjoy most, and your cheesecake will shine even brighter!
Additional Tips & Notes
While baking your strawberry cheesecake, keep in mind a few tips that can enhance your results.
First, let your cream cheese soften completely for a smoother batter. If you want a richer flavor, try adding vanilla extract to the filling.
Don’t skip chilling the cheesecake; it really helps set the flavors. For a stunning presentation, reserve some fresh strawberries to garnish right before serving.
If you prefer a thicker crust, simply press more of the dry cake mix into the pan.
Always check for doneness with a toothpick—when it comes out clean, your cheesecake is ready to cool!
Enjoy!