Why You’ll Love This Raspberry Poke Cake Recipe
You’ll absolutely adore this Raspberry Poke Cake recipe for its simplicity and vibrant flavor. I love how easy it’s to whip up, making it perfect for any occasion.
The cake turns out moist and airy, while the raspberry gelatin infuses it with a delightful burst of fruity goodness. It’s like a summer party in every bite!
Plus, the fluffy whipped topping adds a creamy finish that compliments the tartness of the raspberries beautifully. You can even customize it with different flavors if you ever want to switch things up.
Trust me; you won’t want to miss out on this delicious treat!
Ingredients of Raspberry Poke Cake
When it comes to whipping up a delightful dessert, the Raspberry Poke Cake is a true champion. It’s not just about the taste; it’s about the experience of creating something that brings smiles around the table. With its moist cake, fruity raspberry flavor, and fluffy whipped topping, every bite is like a little celebration.
Plus, the ingredients are super straightforward—if you can read a box, you can totally make this cake. So, let’s gather up what we need to get started on this sweet adventure.
Ingredients for Raspberry Poke Cake:
- 1 (18 ounce) box white cake mix with pudding
- 1 1/4 cups water
- 1/3 cup vegetable oil
- 3 egg whites
- 1 (3 ounce) box raspberry Jell-O gelatin (4 serving size)
- 1 cup boiling water
- 1/2 cup cold water
- 2 cups frozen whipped topping, thawed
- Fresh raspberries (to garnish)
Now, a few things to keep in mind about these ingredients. First off, the white cake mix with pudding is a game-changer—it gives the cake that extra moistness and fluffiness we’re all looking for.
And don’t worry if you can’t find fresh raspberries; frozen ones can work in a pinch, though they mightn’t be quite as vibrant. If you’re feeling adventurous, you could even try switching up the flavors with strawberry Jell-O for a fruity twist.
Just imagine the possibilities—different colors, flavors, and all the joy that comes with it. So, let’s roll up our sleeves and jump into making this delicious cake.
How to Make Raspberry Poke Cake
Making a Raspberry Poke Cake is like setting off on a delightful culinary adventure—each step brings you closer to a sweet masterpiece. So, let’s plunge into the nitty-gritty of how to whip this beauty up.
First things first, preheat your oven to a cozy 350 degrees. While that’s warming up, grab a 13×9-inch pan and grease just the bottom with some shortening or cooking spray. You want to make sure your cake doesn’t stick, because nobody wants to be wrestling with a stubborn baked good.
Now, let’s get mixing. In a large bowl, combine 1 (18 ounce) box of white cake mix with pudding, 1 1/4 cups of water, 1/3 cup of vegetable oil, and 3 egg whites. Just imagine the lovely aroma as you blend these ingredients together.
Mix them according to the package instructions until everything is nice and smooth—like a cozy blanket for your cake. Once it’s all together, pour that luscious batter into the prepared pan and pop it in the oven. Bake for about 28 to 33 minutes. You’ll know it’s done when a toothpick inserted in the center comes out clean. Patience is key here; while you wait, you can think about all the compliments you’ll get for this dessert.
Once baked, let the cake cool completely for about an hour. This is the moment when you get to transform your cake into a poke cake. Grab a fork and pierce the surface every 1/2 inch. It might feel a little odd, like you’re giving your cake a little acupuncture session, but trust the process.
In a small bowl, stir together 1 (3 ounce) box of raspberry Jell-O gelatin with 1 cup of boiling water until it’s all smooth and lovely. Then add in 1/2 cup of cold water to cool it down. Pour this vibrant mixture over the poked cake, letting it seep into all those little holes. It’s a messy, colorful sight, and believe me, it’s worth every drop.
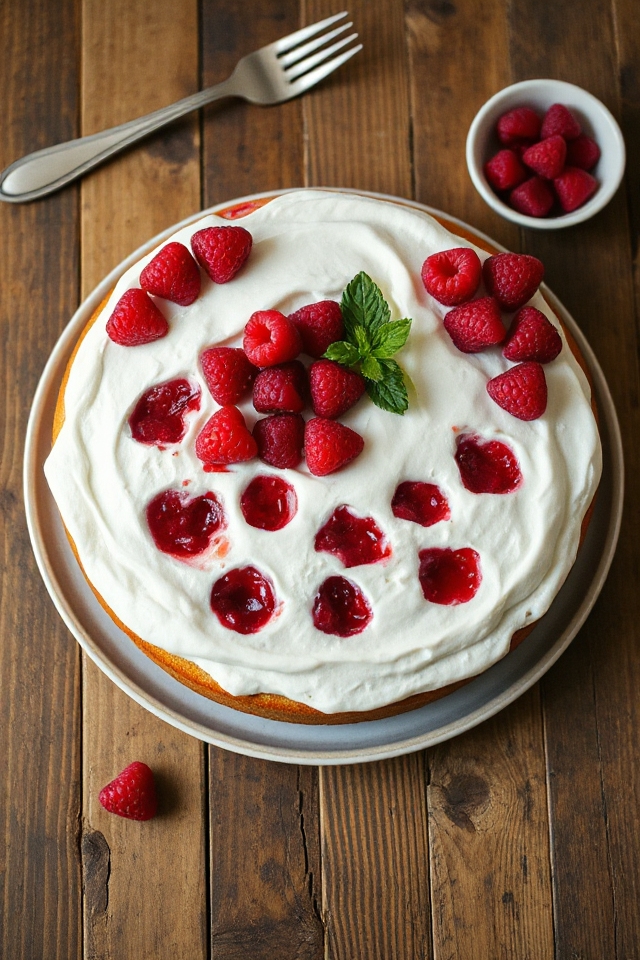
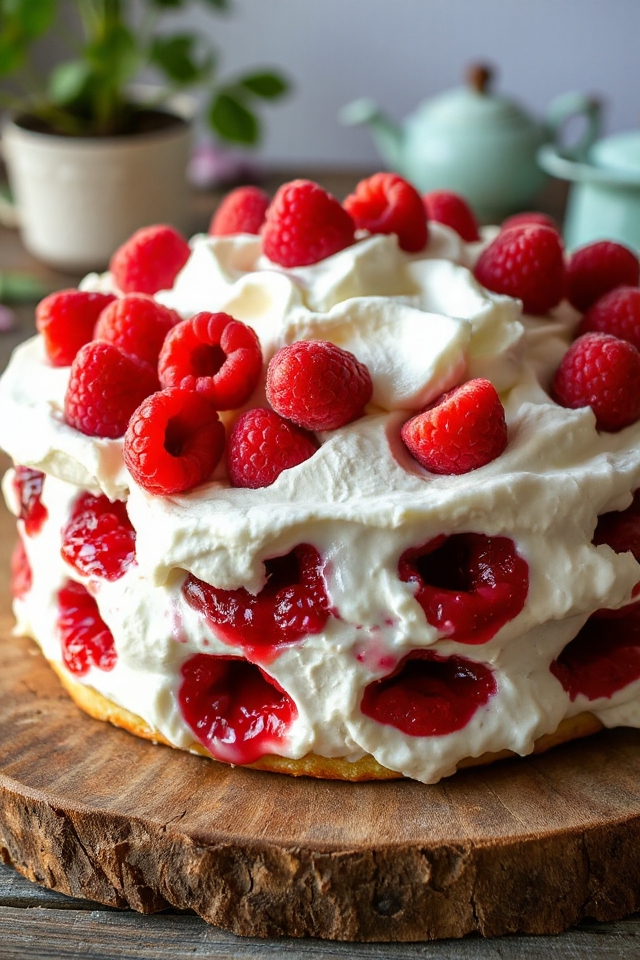
After that, run a knife around the edges of the pan to loosen the cake, and refrigerate for at least 2 hours. When it’s time to serve, spread 2 cups of thawed frozen whipped topping over the top, garnishing with fresh raspberries. Each slice is a burst of fruity joy, and you’ll be the star of the dessert table.
Just be prepared for everyone to ask for the recipe—and maybe a slice to take home.
Raspberry Poke Cake Substitutions & Variations
If you’re looking to put a unique spin on the classic Raspberry Poke Cake, there are plenty of substitutions and variations to explore.
For a fruity twist, try using strawberry, blueberry, or peach gelatin instead of raspberry. You can even swap the white cake mix for a chocolate or lemon cake for a different flavor profile.
If you’re feeling adventurous, add a layer of cream cheese frosting beneath the whipped topping for extra richness.
Don’t forget to garnish your cake with fresh fruit that matches your chosen gelatin – it adds a lovely touch and enhances the cake’s visual appeal!
What to Serve with Raspberry Poke Cake
Exploring different flavors and variations of Raspberry Poke Cake can be a fun way to customize your dessert experience, but the right accompaniments can elevate it even further.
I love serving this cake with a scoop of vanilla ice cream; the creaminess perfectly balances the tartness of the raspberries. Fresh whipped cream is another great option, adding a light, airy touch.
For a bit of crunch, consider some toasted almonds or walnuts on the side. If you’re feeling adventurous, a drizzle of chocolate sauce over the cake can create an unexpected but delightful contrast.
Enjoy experimenting with these ideas!
Additional Tips & Notes
While preparing your Raspberry Poke Cake, keep in mind a few helpful tips to enhance the final result.
First, make sure your cake is completely cool before poking holes; this helps the Jell-O soak in better. If you want extra flavor, consider adding a splash of lemon juice to the gelatin mixture.
For a beautiful presentation, use fresh raspberries that are plump and vibrant.
Finally, cover the cake tightly in the refrigerator to keep it moist. If you’re serving it later, wait to add the whipped topping until just before serving to maintain its freshness.
Enjoy your delicious creation!